Friday, December 9, 2011

Quick and Dirty Photoshop Levels for Toy Camera Pics

Flat, Boring, Underexposed Images?
You can fix that.

     Unless you've modified your Holga or Diana to be more precise with exposure, you're bound to have some shots that just don't make the grade when it comes to exposure. Even with properly exposed negatives, I find the scans from my Holga to be a bit flat and in need of some tweaking to get them to a place that I like. Usually I avoid any of the automatic color/contrast/levels corrections since they tend to do strange things to my Holga images. Same goes for the eyedropper feature for picking black points and white points (they'll shift your color).
     One of the nice things about using "Levels" in Photoshop is that it really hasn't changed across all of the updates and versions. We're not going to confuse anyone with layers today, so let's be easy and simple.

     First things first: Open your image. Go to "Image" -> "Adjustments" -> "Levels"

     You should now have something that looks like this (without the red circle and line)...


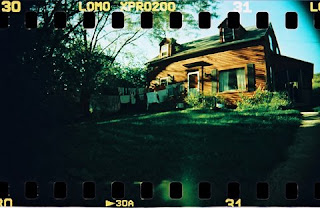
     What you are seeing when you open levels is called a histogram - it's basically a graph of all of the information in your file with the left hand side being all the dark stuff and the right hand side being all the light stuff. The reason I circled the peak in the histogram above is to point out what information it correlates to. The peak corresponds to the darkest of the dark area of your image, in this case it is the vignette caused by the natural fall off of the wide angle Holga lens. There is really nothing in that area of the image, so we'll do this...


     If you grab the little black arrow on the left and slide it to the right, you will see your image getting darker. What you are doing is telling Photoshop that everything to the left of the arrow is BLACK. I stopped just before the next rise in the histogram since it started to affect the look of the rest of the image. Next we'll brighten it up a bit...


     Now... take the white arrow on the right and slide it to the left, but don't go too far (you don't want this look like a digital camera pic)!

     Those two simple steps in Photoshop's levels will make almost every low contrast or underexposed shot look worlds better. Here's a before and after of this picture and one other that used the same method. If your image editing software has a "Histogram" feature, you can follow the same steps and it should yield the same results!


      Thank you to Michael Langlais for letting us use his images!

OldSchoolPhotoLab.com is an awesome mail-order photo lab that still processes all kinds of film!

Tuesday, December 6, 2011

The REAL first Analog Ambassador!

Kim Oberski!
 Kim is the only Analog Ambassador that was a customer of OldSchoolPhotoLab.com before we started the contest. She was the first Ambassador to get her new Holga and film in hand when she won because she had an order at the lab. In fact, she was so on top of her game and ahead of the curve we let her first Ambassador post go by unnoticed! Out sincere apologies to Kim!

Without further ado...
"After shooting with digital cameras since they were first introduced, I decided to dabble in learning to use film over the past 1.5 years, instant and analog. Instantly, I fell in love and now have a variety of cameras including: instant, 35mm, medium format, and digital. It's an honor to be chosen to share my thoughts on analog film and have Old School Photo Lab develop the prints. My name is Kim Oberski and I am an Analog Ambass.ADORE!"

Read the submission that got Kim a new Holga, a bunch of film and free processing: http://www.unscriptedmomentsphotography.com/...


After having used quite a bit of instant film in the past Kim's first Analog Ambassador rolls turned into a humbling experience - read all about it in her post: in which our Ambassador is disappointed by underexposure, but hopeful for the future.

OldSchoolPhotoLab.com is an awesome mail-order photo lab that still processes all kinds of film!  

Monday, December 5, 2011

Introducing our first Analog Ambassador!

Devon Rowland!

Devon Rowland is a Baltimore-Washington based photographer with a passion for swing dancing, travel, and ice cream.  With no formal training in photography, Devon has worked to find her style by endless trial-and-error and her strong artistic eye developed through years of her mother dragging her through museums.  She has learned a lot by shooting with her DSLR, but ever the adventurer, Devon is ready to challenge herself with a new style of photography--film!

Here is the submission that won her a Holga camera and a bunch of film and processing:
http://somewhatfuzzy.wordpress.com/...


Devon was the first Ambassador out of the gate when it came to blogging about her analog adventure. Since then, she has had her first roll come and go from the lab. You can read about her experience so far in her first official Analog Ambassador post - in which our Ambassador learns the lesson of the Holga film mask.

OldSchoolPhotoLab.com is an awesome mail-order photo lab that still processes all kinds of film! 

Friday, December 2, 2011

Analog Ambassador winning submissions!

The following four submissions were picked by a jury made up of employees and friends of the lab located in at least 2 different time zones, so the process involved a lot of e-mails... We tried to pick a range a personalities and were really looking for people who seemed like they would be enthusiastic about photography and sharing their experiences. Without further ado here are the winning entries:

Melissa B.: http://melissaannbarrett.blogspot.com/...

Kim O.: http://www.unscriptedmomentsphotography.com/...

Devon R.: http://somewhatfuzzy.wordpress.com/... 
 

Sarah Z.: http://www.thesarahshow.com/... 
 

Finding consensus about who should get to be an Ambassador was pretty difficult, so it was nice to be able to have the public vote over at BelieveInFilm.com to fill the final slot. You guys made a good choice when you picked:
 

Jennifer L.: http://jenrlangman.typepad.com/... 
 

Check in next week when we start posting profiles and the first blog posts from our Ambassadors! They have their cameras and some of them have already had some rolls processed! 

If you missed the submissions that didn't make the cut, check out our last blog entry! 
http://oldschoolphotolab.blogspot.com/2011/11/analog-ambassador-submissions-long.html

Monday, November 28, 2011

Analog Ambassador submissions... long delayed...

We'd like to say a big "Thank You" to everyone who submitted entries for the OldSchoolPhotoLab.com Analog Ambassador contest! This has been a long delayed posting, but we thought we should share the entries and let everyone take a peek at some of the great entries!

Today we'll share the entries that sadly didn't win, but some of them are quite good! Later this week we'll post the 5 Ambassador entries that made the final cut!

First, I would like to present the submissions that made it to the final round of voting on Believe in Film (not including the winner...):

Victoria B.: http://cucinabodanza.blogspot.com/...
Hana K.: http://supahcute.com/...
Arianne Angela S.: http://www.derpinsel.com/...
Tim W.: http://bono66.tumblr.com/...

Here are the entries that didn't make the first cut (as voted by our jury of employees and associates):

Rubi A.:  http://the-den.blogspot.com/... 
Denvie B.:  http://denbilina.tumblr.com/...
Cristen B.:  http://cristenbland.blogspot.com/...
Danielle C.:  http://tumblrgeek.posterous.com/...
Angelo C.:  http://gellocalderon.tumblr.com/...
Camille G.:  http://polaroidex.tumblr.com/
Shannon G.:    http://shenanigan02.blogspot.com/...
Anna H.:  http://annahornby.tumblr.com/...
Thomas H.:  http://shootfilmnotpeople.net/...
Ann N.:   http://annielog.blogspot.com/...
Olivia N.:  http://the-path-less-traveled.tumblr.com/...
Abigail N.:  http://eyesofab.com/...
Yovanka P.:  http://mangosweet.tumblr.com/...
Kaspars S.:   http://nameisisfilm.wordpress.com/...
Sarah S.:   http://sarahsandovalphotography.tumblr.com/...
Chris U.:  http://cutano.com/...

Tuesday, July 19, 2011

Cross-Processing, part II: Kodak and Lomography films, cross-processed

Hopefully you tuned in last week for Part I of the cross-processing special, in which Old-School Photo Lab's Ty Ueda reviewed the results the various Fuji slide films give when cross-processed. Without further ado, here are his expert opinions on the cross-processed results of Kodak and Lomography slide films. All the images are Ty Ueda's.


Kodak E100G
E100G creates robust and saturated images with just enough contrast to make things deep and impacting.  Best used on a sunny day, point at the nearest colorful object and snap away!


Kodak E100VS


E100VS, a film that is rather dense in nature, is one of the slide films that Kodak is still readily producing.  This film, as abbreviated in its title, is very saturated, and when cross processed tends to have rather high amounts of contrast. 


Kodak Ektachrome 100 EPP Plus


 Ektachrome 100 EPP is a classic slide film produced by Kodak known for its high contrast, pleasurable skin tones, and high saturation.  When cross processed, this film has an exorbitant amount of contrast, which looks great for things like silhouettes.  This film has been discontinued so keep an eye out for it!


Kodak Ektachrome EPR 64

A film widely regarded as the industry standard, Kodak EPR 64 is a low speed slide film known for it’s great tones under controlled daylight lighting situations.  The film offers neutral colors and a touch of contrast, making it a great all around film.  Sadly this favorite has long been discontinued, and since most EPR that is found is expired, it tends not to have some of its fine grain qualities.


Kodak Ektachrome E200


Boasting an extremely fine grain, Ektachrome E200 presents wildly cool tones to a photo of every situation.  In any sort of lighting, E200 will take your photo and slap a blue intensifier on the photo and leave it looking as blue as the sky can be. 


Kodak Elitechrome 100 EB


Only produced in a 35mm size, Elitechrome 100 EB gives off a vast collection of radiant colors, ranging from underwater-like blue tones to neon yellow tints.  Under daylight, expect clear deep blue tones in the sky and around landscapes, while indoor lighting situations usually give off the yellow cast that already radiates from tungsten light. 


Kodak Elitechrome 100 EBX


Yes, it is just like it sounds! Elitechrome EB Extra Color  is everything you love about Elitechrome 100 EB with a touch more saturation and contrast.  This film successfully takes the already outrageous colors from Elitechrome EB and turns the dial up to 11! 
*PLEASE NOTE* Both Elitechrome EB and EBX are often deemed unscannable by our machines.  To best avoid this, try under-exposing the film rather than over exposing it.


Lomography X-Pro Chrome 100


Since Lomography seems to be on top of the whole cross processed movement, they began packaging their own slide films to sell exclusively labeling them for cross processing.  This film offers high saturation and tones much like those of Elitechrome EB.


Lomography X-Pro Slide 200


Another slide film produced by Lomography! This film generally yields a wider range of color casts, along with a lower contrast than the 100 film they produce.  With my personal use of the film, I’ve received everything from red overcasts to yellow tints to green flares, so I’ve always deemed X-Pro Slide 200 as a rather unpredictable film.  

Thursday, July 14, 2011

Guest post: the Fuji slide films, cross-processed

Ty Ueda works here in our lab; he is something of a connoisseur of cross-processing. Since there's so much interest, in the recent return to film, in cross-processing, I asked him to assemble his thoughts on the results the various available slide films yield, when cross-processed. Here are the various Fuji films compared; we'll have the Kodak and Lomography offerings in upcoming posts.


Fuji Velvia 50F


They say it’s not easy being green, but when it comes to photos, Velvia 50 makes it worth the work. With a very slow film speed, Velvia 50 almost must be in the outdoors, but when utilizing the film in combination cross processing, photos exhibit high contrast and eerie green and yellow casts under any kind of light.


Fuji Velvia 100F

The easier to use brother of Velvia 50, Velvia 100 gives off radiating velvet-like colors. With color casts ranging from purple to yellow, the unpredictable Velvia 100F is a great all around film that will give off seemingly random colors.


Fuji Provia 400X/400F

If looking purely for saturation without major color casts look no further! Neither Provia 400x nor Provia 400F have overwhelming color casts yet still boast high saturation and contrast when x-pro’d. Overall a great film for many different lights and situations.


Fuji Provia 100F

A personal cross-processing favorite of mine, Provia 100F gives off an overall green cast to any photo! Provia 100F looks great in any situation for an eerie green look to your photos, and depending on the camera of your choice, the photos will sometimes be inhibited by a slight blue or yellow color.


Fuji T64

Fuji T64 is a very low speed tungsten balanced film. When you cross process this corrective film, you’ll receive a whole different array of colors. In outdoor sunlight, your photos will have a red tint with blues that are deeper than deep and under indoor tungsten light, expect an overwhelmingly red tint to your photos. Warning! This film is very slow, so make sure you’re using the right camera!


Fuji Astia 100F

Astia 100F is yet another wonderful yet increasingly harder film to find after it was discontinued recently. Astia 100F when cross processed gives a relatively low amount of contrast while, depending on the lighting situation, giving the photos a varying amount of magenta.


Fuji Sensia 100
Depending on the exposure of the photo, Sensia can deliver a range of different tones and looks. When underexposed, Sensia 100 will give off Red/Orange/Blue tints to photos depending on the color temperature of the light. When overexposed, the film can exhibit close to normal color tones with little yellow overcasts and red in the shadows. Sensia 100 has been discontinued as well. However, it is the easiest of the Sensias to find.


Fuji Sensia 200
Sensia 200 is a very different animal from Sensia 100. Sensia 200 gives off very saturated blue green and yellow tones, without any particular overwhelming color casts. Like Sensia 100, Sensia 200 is capable of producing almost regular looking photos when cross-processed if overexposed. Sensia 200 is mildly harder to find than Sensia 100, so keep your eyes peeled.


Fuji Sensia 400

Commonly referred to as the holy grail of the Sensia family, Sensia 400 delivers some of the wildest and astounding colors while cross-processed. Boasting relatively low grain for a 400 speed film, Sensia 400 to many is the most desirable, hard to find, and satisfying film for cross processing.

Saturday, July 2, 2011

A Short History of Consumer Cameras in the US Since the 1970s

When I got into the photo business in the early 70s, 35mm and medium-format (120, 220, 620) were for professional photographers and serious amateurs. At the time, the dominant consumer cameras were Instamatics, which were instant-load cameras that took cartridge film. The first were 126; later came 110. Before the 1960’s, not every family had a camera; Instamatics’ ease of loading made photography much more mainstream. Family photography as we know it today came about in the late 1960’s. My dad had a Instamatic X45, which he loved.

126 film had negatives that were about the size of a 35mm negative, which was to say, negatives big enough to support good-sized enlargements. They were the first cameras to take flash cubes as opposed to flash bulbs, which made it possible to take four images in quick succession. Though the first 126 cameras were very simple, more complicated cameras came later, including the Kodak Retinas, which had interchangeable lenses.

In the 1960’s and 1970’s, Kodak was a marketing powerhouse, and one of the early adapters of personality-based marketing. 110 was a success from a marketing perspective, but because of the small size of the cameras, the film had to be quite narrow, which meant that the negatives were very small. Many people were frustrated by the marginal quality of images from 110—especially at sizes bigger than 4x6 or so.

35mm was originally for serious photographers, but the 35mm’s climb to dominance in the broader market was started by the Canon AE-1, and in particular, Canon’s Jimmy Connors advertising campaign. The camera was preprogrammed and fully automated. The pitch was something like, “the professionals use this, now you can too--professional quality images through automation.”

Kodak’s next innovation was disc film, in the early 1980s. The product launch was huge in advertising dollars, and there were attractions—especially the camera’s automation and its small size. However, the product had its liabilities--the image was too small to yield good prints. The film was color negative only, 15 exposure. It had to be loaded on a spindle and spun in chemistry to be developed.

APS stands for ‘Advanced Photo System’; it was a creation of a conglomerate of the major manufacturers of photo and photolab equipment (Kodak marketed it as ‘Advantix,’ Fuji Film as ‘Nexia,’ and Agfa as ‘Futura’). APS came out in the mid-1990’s, when photography was already anticipating the digital revolution; APS was marketed as a bridge to digital photography. In fact, the technology was not that different than that of standard analog photography. APS cameras were able to capture images of different aspect ratios--you could set your camera to ‘classic,’ ‘high-definition,’ or ‘panoramic.’ The film was a cartridge film, and it was possible to change film mid-roll.

From the 1990’s on, the emphasis in consumer photography came to be about producing better point-and-shoot cameras cheaper—and with more features for ease of use. Auto-load and auto-advance were both popular features. Eventually the trend culminated in single-use cameras, which made decent images available for very little more than the price of a roll of film.

The trend in late twentieth-century consumer photography was finding ways capture images more and more precisely at a lower and lower cost. By contrast, the return to film photography in the new millennium seems largely to be a “lo-fi revolution”—what is compelling about film to today’s photographers is largely the ways in which the image is captured imprecisely.

Friday, May 20, 2011

Tripping the Light Plastic Fantastic: a (short) history of toy cameras

The original toy camera was the Diana; little more than a plastic box that let in a bit of light, it did not require a battery, and it had very few settings—two shutter speeds, three aperture settings, and manual focus. No one knows when exactly the Diana was first manufactured by the Great Wall Plastics Company, but it was first imported to the U.S. around 1966. In the U.S., the Diana was sold mostly in drug stores, especially drug stores in touristy areas, and generally retailed for sixty-nine cents—even in today’s dollars, less than $5. Similarly, though 35mm film was available, the Diana used the less expensive medium-format (‘120’) film.

Image from a Diana camera, courtesy Ty Ueda.
The Diana arrived on the scene just as photography became accepted in university contexts, and it gained in importance when photography instructors realized that the toy camera allowed students to learn the basics of composition without investing in expensive and complicated equipment. Jerry Burchard and Arnold Gassan in particular championed the Diana as a teaching tool.

Some of the students of the late 1960’s went on to become the first professional photographers to work with the toy camera. Nancy Rexroth’s Iowa was the first major exhibition of toy photography, exhibited at the Corcoran in 1971; and in 1979, there were more than a hundred entrants to The Diana Show, a juried exhibition in California. Photographers accomplished on much more sophisticated cameras enthused about the relative simplicity of taking photos with toy cameras, as well as the unpredictability of the image owing to light leaks.

Before The Diana Show had even concluded, the Diana had already been discontinued. But it had become so popular that several similar cameras soon came to take its place. Reader’s Digest and J.C. Penney commissioned their own toy cameras as promotional items. The drug-store market saw the introduction of the “Megomatic,” the “Snappy,” and the Future Scientist,” which were slightly more sophisticated than the original Diana. (They also pretended to be even more sophisticated than they were, with fake light meters and the like.)

But of course the Holga was the most important of the Diana’s toy camera successors; it was developed by T.M. Lee in the early 1980s. Intended to record family portraits and events of working-class families in China, the camera had to be very inexpensive. No surprise, then, that it was very rudimentary—even more rudimentary than the Diana. The Holga had no true aperture selection and one shutter speed; the focus dial was marked with figures in place of numbers. While the Diana’s images had been 4cm squares on 120 film, the Holga was capable of either square or rectangle images.

Holga image with 'dark corners.' Image courtesy Emily Scheideler.
The Holga was developed to accommodate the 120 that was the dominant film in the Chinese market, but while the camera was in production, the Chinese laws governing imports changed, and 35mm film swept the nation. Bcause of this, Universal Electronics had to seek other markets for the camera. It was successful in Hong Kong and then even more successful in Europe, where its images’ distinctive vignette effect (“dark corners”) was very popular.

Toy cameras’ popularity grew steadily throughout the 1990’s and has increased even more precipitously over the last decade, seemingly in inverse proportion to the strength of digital. Several organizations have manufactured and marketed a dizzying array of toy cameras. Unfortunately, because of the cost of both the cameras themselves and the processing, the latest generation of toy cameras has gotten away from what was the essence of the earlier generations—toy cameras’ accessibility to everyone, regardless of budget.

For more information, please consult
Michelle Bates’ Plastic Cameras: Toying with Creativity
http://holga.co.tv/

Wednesday, May 18, 2011

About push and pull processing


Push processing refers to intentionally over-developing a roll of film to allow the formation of additional density in the emulsion of the film. It can be accomplished by either increasing the time or the temperature during the formative development step. Pull processing refers to intentionally under-developing a given roll of film, i.e. giving it less time (or a lower temperature) than is recommended. Push and pull processing has become very popular with the new generation of film users, who enjoy experimentation and want unusual, even unpredictable results.

Original image, left; with 'push' processing, right.
All kinds of film (black and white, C-41, and slide/E-6) can be pushed/pulled, though the results on color film are typically less predictable (because of color shift in the layers) than those on black and white.  Film manufacturers, in general, did not recommend push/pull for color film because it results in a lack of natural color variance.  (For instance, a natural flesh tone could be very difficult to achieve in pushed color negative film.) But that has not stopped forward-thinking labs from doing it to accommodate their customers who wanted to break the rules or to salvage what might have been otherwise worse, due to under/over-exposure.

Original image, left; with pull processing, right.
The most common purpose for push/pull processing involves compensating for mistakes in the way that a given roll of film was shot.  So, for instance, in a case where you had your camera set for ISO 400 but you were shooting ISO 200 film, you might request ‘push’ to remedy mistake. In theory, if it were a very sunny day but you had only ISO 100 film, you might request pull processing. (The standard advice is that you should never try to correct more than one stop’s difference with pull processing.)

Hobby and art photographers often make use of push/pull processing to intentionally create unusual variations in color and saturation. Push processing is associated with higher contrast than you would get by processing film at its rated speed; conversely, pull processing tends to decrease contrast. In black and white, push processing tends to be particularly evident in the graininess of the image; where this texture is sought after, push processing may be called for.


Many photographers combine pull processing with cross-processing. Since cross-processing tends to increase contrast, this can be compensated for by pulling the film. The reason you would do this is to take advantage of the distinctive color casts of cross-processed film without all of the contrast of cross-processing.

It is important to note that different brands and speeds of film show entirely different results to the same temperature/time alterations.  For instance, a roll of Kodak Ektachrome 100 and a roll of Fuji Velvia 100 show wildly different color and saturation when cross-processed to the same formula.

120processing.com will be happy to push/pull your film; the option costs $2.00 per stop. We can go up to three stops push, and two stops pull. (We do not recommend either extreme, but we do offer it!)  Please clearly mark ‘push’ or ‘pull’ on the order form.


Monday, May 16, 2011

Scanning 120/'medium-format' negatives


Image by Ty Ueda
Unless you are printing your medium-format film yourself (and bravo if you are!), you will probably want to get your negatives scanned.  You can do this in two ways: by purchasing a scanner and scanning them yourself, or by having the negatives scanned professionally.  

Self-scanning
Though reasonably priced negative scanners for 35mm film intended for home use have improved significantly over the last few years, unfortunately, that is not true of equipment made to scan medium-format/120 film.  If you want to have the negatives scanned simply so that they can be viewed online—for instance, so that you can share them on your facebook page or in your favorite flickr group—you may be satisfied with the quality of a flatbed scanner that has a ‘transparency adapter’ intended for home use. 

If you’re in the market for a flatbed scanner with a transparency adapter, read product reviews and ask your friends about their experiences.  Manufacturers change the instrumentation and specifications frequently, and it is difficult to keep up.  The  “off-the-shelf” office supply flatbed scanner from which I saw the best 120 scans was a HP Scanjet G4050, which had adapters for several different sizes of film.  It was current about three years ago and retailed at only a bit over $200.00 (US).  It was not fast, and it took some getting used to, but the output was excellent for screen use and making small prints.  I never tried large enlargements, but the scans would be adequate for at least an 8 x 10.

For a high-quality ‘dedicated’ film scanner, the Nikon Coolscan series is probably the best known and most highly recommended by users. We had a Minolta Pro Scan a few years ago that was quite nice, but it has been discontinued. 

Professional scanning
Since the quality of reasonably priced home scanners for medium-format film remains marginal, if you want to have digital images that will translate into high-quality larger prints or publishing your work, you will want to look into professional negative scanning.

Technology exists for high-quality, high-resolution scans of 120 negatives—but it is pricy. (Professional scanners can cost more than $30,000).  So if you want to be able to store your images digitally, or send/print high-quality images, your best bet is to ask a a friend or professional who actually ‘does it’. 

Not all professional scanning is created equal.  There are several factors, here:
1.     The scanner that the photo lab is using (We use a Fuji Frontier for our 120 scanning).
2.     The quality at which they scan your images (high resolution/low resolution/print resolution). There are a dizzying array of terms, here, and specifications are many and complex.
3.     The operator has to know how to scan!  We had a Leaf Scanner we purchased for over $18,000 several years ago.  We could not make consistent quality scans until we had practice a lot and studied the complete manual.  Scanning is not ‘plug and play’ technology. Moral of the story: once you find a photofinisher with a professional-quality scanner, try a few tests before you order a bunch.

Most labs charge different prices depending on the resolution of the scan (the price schedules will hopefully differentiate between ‘basic’ and ‘enhanced’ scans). Generally, high-quality scans involve more data and thus take more time and skill to complete.

If you are interested in scanning negatives to produce images, you need to take account of the specifications of the printer with which you'll print.  If your printer is only 72 dots-per-inch, then there's no reason to pay for scans at 300 dots-per-inch; the extra data will not improve the image and may even make it worse.

In our lab, our printing equipment prints ‘native’ in 300 dpi. We have these approximate guidelines for our customers:

If your scan is…                        You can confidently print up to…
1200 pixels by 1800 pixels                 4” x 6”
1500 pixels by 2100 pixels                 5’’ x 7’’
2400 pixels by 3000 pixels                 8” x 10”


Even with these numbers in mind, I am still sometimes surprised by small files.  They can astound and confound me if I look at the output quality and information they contain.  It does not always make sense.  Still, as a guide, the above is what we use on a daily basis for consistently good results with our equipment.  Remember, if you are just using it for screen resolution and email, you do not need to invest big dollars in scanning!